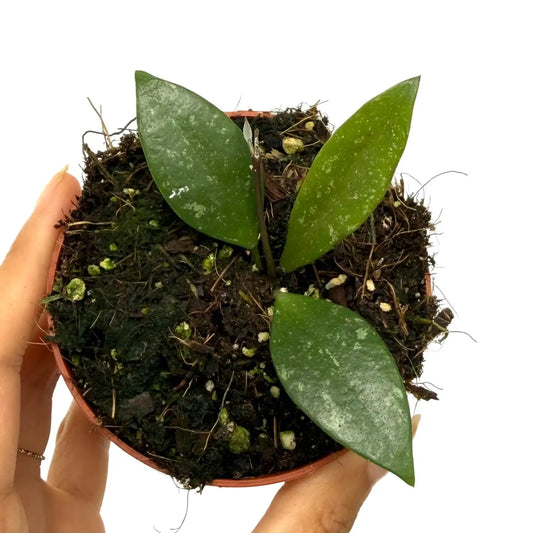
Propagating a Hoya: the complete guide to rooting cuttings in water and potting mix

Propagating a Hoya is simple and highly rewarding: take a stem from the current year with 1 to 2 nodes, root it in water or sphagnum moss in spring or summer, then pot up the rooted cutting in a free-draining potting mix. The RHS (Royal Horticultural Society) confirms that a simple stem cutting placed in a glass of water will form roots in 2 to 3 weeks. There is one absolute rule, however: never take a stem bearing flower spurs, as these are what produce future blooms. Hoya is one of the easiest houseplants to propagate, making it an excellent first propagation project, even for beginners. It is also the best way to expand your collection for free and share your favourite varieties with loved ones. Here is the complete step-by-step method for propagating your wax plants with the best chance of success.
Propagating Hoya: the method at a glance
Hoya is propagated from stem cuttings, either in water or in a light growing medium. The principle is always the same: take a piece of stem with at least one node, place it in a warm, moist medium to root, then pot it up once the roots have developed. Rooting hormone is unnecessary: Hoya roots readily on its own. Here are the four key steps, suitable for most varieties.
| Step | What to do |
|---|---|
| 1. Choose a stem | A healthy stem from the current year with 1 to 2 nodes |
| 2. Cut | Just below a node, using a clean, disinfected tool |
| 3. Root | In water or sphagnum moss, in warmth and bright light |
| 4. Pot up | Once the roots are 3 to 5 cm long, in a free-draining potting mix |
When to propagate Hoya
The best time is from spring to early summer, when the plant is actively growing and temperatures are warm enough. The RHS recommends taking cuttings from the previous year's stems in spring or early summer. Rooting is possible outside this period, but takes longer. The reason is simple: Hoya roots in response to warmth and light, both of which are at their strongest in spring and summer. In winter, sap flow slows, roots take longer to emerge, and the cutting may rot before it takes. If you have to propagate in the colder months, be sure to keep the cutting warm and under a grow light to make up for the lack of light and warmth.
| Season | Propagation conditions |
|---|---|
| Spring | Best time: growth resumes and the days get longer |
| Early summer | Ideal warmth and light for rapid rooting |
| Autumn | Possible, but rooting is noticeably slower |
| Winter | Best avoided: growth stops and there is a risk of rot |
Propagating in water, step by step
Water propagation is the simplest and most visual method: you can watch the roots appear through the glass, making it ideal for beginners and children. Keep the node submerged and the leaves above the water to prevent rot. There is one drawback to bear in mind: roots formed in water are somewhat delicate and need to adjust to the potting mix, which is why careful potting up and regular watering during the first few weeks are important.
| Step | What to do | What to look for |
|---|---|---|
| Prepare | Remove the lower leaves from the stem | Keep 2 to 3 leaves at the top |
| Submerge | Place the node under water, with the leaves above it | Use a clear glass and room-temperature water |
| Maintain | Change the water every 3 to 4 days | Roots should be visible in 2 to 3 weeks |
| Transfer | Pot up when the roots are 3 to 5 cm long | Use a free-draining, moist potting mix |
Propagating in sphagnum moss or potting mix
For stronger roots and an easier transition to a pot, choose damp sphagnum moss or a very airy potting mix. This method avoids the shock that water-grown roots sometimes experience when potted up. Sphagnum moss retains moisture while allowing air to pass through, recreating the natural conditions of Hoya, which is often epiphytic in its native habitat. Keep it just moist, never waterlogged, and place everything somewhere warm and bright.
| Medium | Advantage |
|---|---|
| Damp sphagnum moss | Strong roots and an easy transition to potting mix |
| Perlite or vermiculite | Excellent drainage, helps prevent rot |
| Free-draining potting mix | Roots in place, with less handling |
| Mini greenhouse or cloche | High humidity speeds up rooting |
Potting up a rooted cutting
Once the roots are well formed, carefully pot up the cutting in a light, free-draining mix and keep it moist but not overly wet. Wait until the roots are at least 3 to 5 cm long before potting up: too soon, and the cutting is fragile; too late, and water-grown roots may struggle to adapt to the potting mix. For the first few weeks, keep the mix a little moister than usual and the plant in bright light, giving new soil roots time to develop. The right potting mix is key to success; see our Hoya potting mix guide to make your own.
columns: 4
columns_mobile: 2
-
Hoya Premium Potting Soil - Enriched with Mycorrhizae and Bacillus - Made in France
Regular price 11,99 €Regular price11,99 €Sale price 11,99 € -


Hoya Fertilizer - 250ml Liquid Fertilizer - Root and Foliar Fertilizer + Free Graduated Pipette!
Regular price 18,00 €Regular price20,00 €Sale price 18,00 €Sale -
Hoya Plant Support - Arch Support for Hoya - Transparent Acrylic Plant Support - Support for Climbing Plants
Regular price From 3,95 €Regular price3,95 €Sale price From 3,95 € -
Transparent plant clips - Transparent plant support clips - Support clips - Plant support clips
Regular price From 4,00 €Regular price4,00 €Sale price From 4,00 €



Common mistakes and safety
Most failures are caused by overwatering, a cutting without a node, or propagating in a season that is too cold. Correct these three things and the vast majority of your cuttings should succeed. Another point to be aware of: Hoya’s milky sap can irritate the skin and eyes, so the RHS recommends wearing gloves when pruning and taking cuttings, and washing your hands after handling the plant. The good news is that the plant itself is classified as non-toxic if ingested by cats and dogs by the ASPCA, making it a reassuring choice for homes with pets.
| Problem | Likely cause | Solution |
|---|---|---|
| Rotting cutting | Too much water or a leaf submerged | Remove the lower leaves and change the water regularly |
| No roots | Cutting without a node or cold season | Take another stem with a node and keep it warm |
| Soft leaves | Not enough light or humidity | Place in bright light and under a cloche |
| Blackening stem | Dirty cut or stagnant sap | Use a clean tool and let the cut dry before placing it in water |
After hundreds of cuttings, I propagate almost everything in sphagnum moss: the roots that form are much sturdier than water-grown roots and handle the move to a pot far better. My one non-negotiable, whatever the method: always keep a node beneath the medium, and never take a stem bearing flower spurs. That’s what makes all the difference.
The propagation calendar, season by season
Propagation follows the plant’s growth cycle: vigorous in spring and summer, then dormant in winter. By timing your cuttings according to this calendar, you give them the best chance of rooting quickly and without rotting. Here’s your guide to the year to help you plan your cuttings and potting.
📅 Seasonal care calendar
| Season | Key task |
|---|---|
| 🌸 Spring | Ideal time: take cuttings and start rooting them as growth resumes |
| ☀️ Summer | Continue in the warmth: rapid rooting; pot up rooted cuttings |
| 🍂 Autumn | Propagation is still possible but slower; pot up before the first cold spells |
| ❄️ Winter | Dormancy: wait until spring to propagate and leave the plants undisturbed |
Hoya propagation at a glance
Here are the key details for successfully propagating your wax plant, ready to refer to before you take your first cuttings.
📋 Quick reference (Hoya cuttings)
The essentials for successfully propagating a wax plant, at a glance.
| Factor | Guideline |
|---|---|
| Cutting type | Current-year stem with 1 to 2 nodes |
| Ideal season | From spring to early summer |
| Rooting in water | 2 to 3 weeks |
| Rooting in sphagnum moss | 3 to 6 weeks |
| Temperature | 20 to 25 °C for good rooting |
| Light | Bright and indirect, never direct sunlight |
| Node | Point where leaves and roots emerge |
| Flower spurs | Never take a stem bearing flowers |
| Potting mix | Free-draining, light and airy mix |
| Safety | Irritating milky sap: wear gloves (RHS) |
Build your collection from cuttings
Propagating cuttings is an inexpensive way to expand your collection and share your best varieties. A healthy mother plant can provide several cuttings every year without becoming depleted, as long as you take them sparingly and always cut above a node. For your first attempts, choose vigorous varieties such as Hoya carnosa Compacta, before moving on to more delicate species. To learn more about care and flowering, see our complete Hoya guide, then browse our plants below to choose your future mother plants.


Laura Bruneau
Jardinière & autrice