Successful Propagation in Sphagnum Moss: The Complete Guide

Successful propagation in sphagnum moss means giving your cutting the right balance of constant moisture and oxygen: the combination that encourages roots to grow without causing them to rot. The rule comes down to three words: moist sphagnum, never soggy, patience. Discover ours in our range of substrates. In sphagnum kept at 22 to 25°C and 80 to 90% humidity, most cuttings root in 2 to 4 weeks. Able to hold up to 20 times its weight in water while remaining airy, it produces sturdier roots than water propagation, ready for potting after 3 to 4 weeks. Take a stem with 1 to 2 nodes and allow 10 to 15 minutes to prepare your cutting, then replace the sphagnum every 2 to 3 months.
This guide explains why sphagnum is an excellent medium for propagation, how to prepare your supplies and cutting, how to set up and care for your cuttings, and how to complete the final repotting without stress.
Why is sphagnum ideal for propagation?
Sphagnum combines two qualities that are rarely found together: exceptional water retention and good aeration. This is exactly what a cutting node needs to form roots without becoming waterlogged.
Its water-retention capacity is remarkable: sphagnum can absorb up to 20 times its weight in water while retaining air pockets between its fibers. Another advantage is its naturally antimicrobial properties, which reduce the risk of rot and increase success rates compared with other methods. This rare combination—plenty of available water and plenty of air—is why so many collectors reserve sphagnum for their most delicate cuttings.
Finally, there is one decisive advantage: roots formed in sphagnum adapt far more easily to their permanent growing medium than roots grown in water, which are often more fragile during the transition. As Iowa State University Extension points out, sphagnum provides high moisture retention and good aeration.
| Medium | Strength | Limitation |
|---|---|---|
| Sphagnum | Moisture + air, antimicrobial | Dries out if neglected |
| Water | Simple, roots are visible | Roots are fragile during the transition |
| Perlite alone | Very free-draining | Retains little moisture |
Preparing your supplies and cutting
Successful propagation starts with clean tools and a well-chosen cutting: a healthy stem with at least one node, where roots will form. Always use a disinfected blade. Ideally, take a stem 10 to 15 cm long with two or three leaves at the top, and remove the lower leaves that would come into contact with the sphagnum.
According to the recommendations of Virginia Cooperative Extension (Virginia Tech), a propagation medium should be porous for aeration and drainage while also retaining water, clean, and low in fertilizer so it does not damage young roots. Sphagnum ticks all these boxes.
| Supplies | Purpose |
|---|---|
| Sphagnum | Moist, airy rooting medium |
| Disinfected blade | Clean cut, without infection |
| Clear container | Monitor roots without disturbing them |
| Bag or lid | Maintain high humidity |
Sphagnum is my favorite method for difficult or valuable varieties. The secret I always repeat: really wring it out, like a well-squeezed sponge. Soggy sphagnum makes the stem rot; sphagnum that's just moist produces beautiful roots. After years of propagating rare plants, I can tell you this step makes all the difference between failure and success.
Setting up and caring for your cuttings, step by step
The most important thing is the moisture level of the sphagnum: it should be moist but never dripping wet. Rehydrate dry sphagnum in lukewarm water for a few minutes, then wring it out firmly, like a well-squeezed sponge.
Next, place the sphagnum in a clear container and insert the stem, making sure the node is in good contact with the medium. Then cover it with a bag or lid to create a greenhouse effect. Put everything in a warm, bright spot with indirect light. Monitor the moisture and air it regularly. The first roots generally appear within two to four weeks, depending on the species and temperature.
| Step | Action |
|---|---|
| 1. Rehydrate | Soak the sphagnum in lukewarm water |
| 2. Wring out | Squeeze until moist, not dripping |
| 3. Set up | Keep the stem node in contact with the sphagnum |
| 4. Cover | Use a bag or lid to create a greenhouse effect |
| 5. Monitor | Air it, keep it moist, and wait for roots |
columns: 4
columns_mobile: 2
-
Plant Addict Living Sphagnum Pack - Sphagnum for Plants - Sphagnum Moss - 3 Sachets
Regular price 26,22 €Regular price28,50 €Sale price 26,22 €Sale -
Straight-point pruning shears - Stainless steel plant pruners
Regular price 7,50 €Regular price10,00 €Sale price 7,50 €Sale -
Set of 10 Transparent Jars
Regular price From 5,70 €Regular price6,00 €Sale price From 5,70 €Sale -
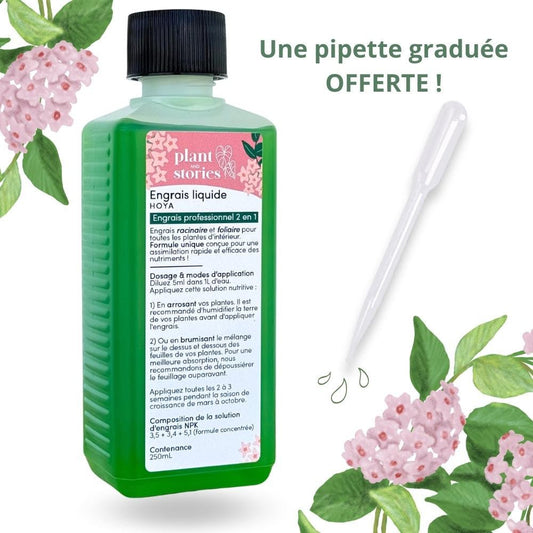
Duo of Fertilizer for All Indoor Plants + Special Hoya Fertilizer + 2 Free Graduated Pipettes!
Regular price 29,99 €Regular price40,00 €Sale price 29,99 €Sale




The role of biostimulants and special cases
There are a few ways to speed up rooting: gentle warmth stimulates cell division, and a heat mat can help out of season. Rooting hormone isn’t essential—many plants root very well without it.
Some plants are especially well suited to sphagnum: aroids such as Monstera and Philodendron, including Monstera, and species that struggle to transition from water to potting mix, such as Scindapsus. Sphagnum can also be used for air layering by wrapping it, while moist, around a cut in the stem. This technique lets you root a branch before separating it from the parent plant, greatly reducing the risk of failure with valuable varieties.
| Situation | Recommendation |
|---|---|
| Aroids (Monstera, Philodendron) | Sphagnum is ideal; keep the node in contact |
| Difficult transition from water to potting mix | Use sphagnum as an intermediate step |
| Air layering | Wrap moist sphagnum around the cut |
| Out of season | Use a heat mat to speed things up |
📋 Quick reference guide (for experienced gardeners)
Key pointers for propagating in sphagnum, at a glance.
| Parameter | Guideline |
|---|---|
| Water retention | Up to 20 times its weight |
| Sphagnum moisture | Moist, never soggy |
| Preparation | Soak, then wring out firmly |
| Cutting | Healthy stem with at least 1 node |
| Environment | Warm, bright, indirect light |
| Cover | Bag / lid, greenhouse effect |
| Key advantage | Roots adapt well to potting mix |
| Ideal season | Spring and summer |
From container to pot: getting the final repotting right
Repot when the roots are a few centimeters long: not too early, and not too late. Roots grown in sphagnum transition to a growing medium without the shock often experienced by cuttings grown in water.
Important tip: there’s no need to remove everything. New roots cling to the sphagnum, so leave the attached fragments rather than pulling them off and risking breaking the roots. These bits of sphagnum will even provide extra moisture for a smooth transition to a free-draining substrate. Then keep the young plant out of direct sunlight for a few days while it adjusts to its new environment, before resuming normal care.


Propagating in sphagnum through the seasons
Propagation in sphagnum follows the plants’ growth cycle: ideal from spring through summer, and best avoided in winter.
📅 Seasonal care calendar
| Season | Key action |
|---|---|
| 🌸 Spring | Ideal time: start your cuttings for quick rooting |
| ☀️ Summer | Warmth (22 to 25°C): optimal rooting in 2 to 4 weeks |
| 🍂 Fall | Propagation is still possible, but slower; repot before winter |
| ❄️ Winter | Avoid it: growth slows to a halt and rot risk increases; wait until spring |
Troubleshooting: cuttings that rot or stop growing
Most failures are caused by sphagnum that is too wet or an environment that is too dry. Here’s how to read the signs.
| Symptom | Likely cause and solution |
|---|---|
| Stem turning black and soft | Sphagnum is too soggy: wring it out more thoroughly |
| No roots after several weeks | Too cold or out of season: move to a warmer spot |
| Leaves drying out | Air is too dry: cover it and maintain humidity |
| Mold on the surface | Not enough ventilation: open it regularly |
Done well, this method turns a simple stem into a new plant in just a few weeks, ready to join your collection. It’s also an excellent way to save a struggling plant: by taking a healthy cutting before a problem spreads throughout the plant, you preserve its genetics even if the original plant should decline.
Multiply your botanical treasures with Plant and Stories
Propagation in sphagnum relies on a simple balance: constant moisture, aeration, warmth, and patience. Wring out your sphagnum well, keep the node in contact, and you’ll get sturdy roots ready for potting mix.
To get started, discover our live sphagnum moss and our specialized substrates, carefully selected in France. With a little practice, you’ll soon be able to multiply your favorite plants and share your cuttings with others: it’s one of the most rewarding pleasures of growing houseplants. In short, clean sphagnum, gentle warmth, and a little patience are all it takes to multiply your most beautiful plants. Monitor moisture without ever waterlogging the moss, ventilate regularly to prevent mold, and repot as soon as the roots are well formed: you’ll get vigorous young plants, perfect for expanding your collection or sharing your favorite varieties.

Laura Bruneau
Jardinière & autrice